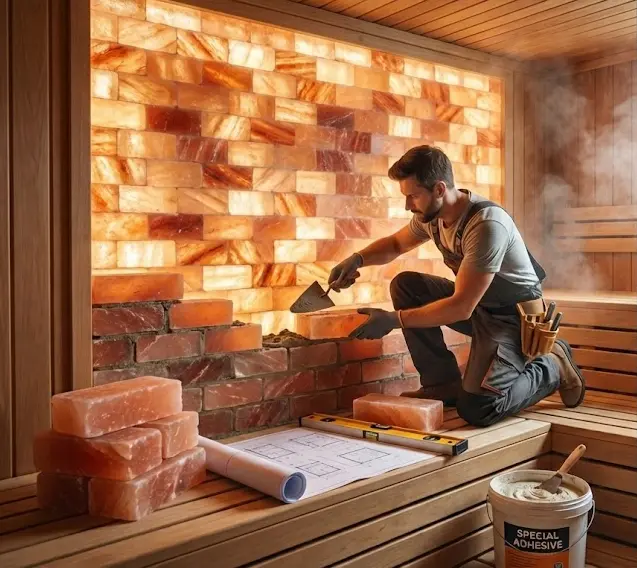
Installing a Himalayan salt wall is a complex engineering challenge where negligence leads to liability; a single 98-inch vertical run exerts 760 lbs of dead load on a standard 48-inch width, ensuring structural collapse if secured only to standard drywall. Beyond weight management, failure to calculate the dew point in 300°F environments creates “crying” walls, where hidden condensation rots the substrate and destroys the installation from the inside out.
This guide defines the technical specifications for a zero-failure build, contrasting the durability of **Sika clear adhesives** against mechanical **stainless steel profile systems**. We examine the specific **IP67 LED** requirements for safe backlighting, detail **ASTM C 270** mortar standards for load-bearing applications, and outline the **R-21 insulation** protocols necessary to maintain thermal integrity.
Why Architects Choose Salt Walls
Architects specify salt bricks for dry infrared saunas to utilize hygroscopic air purification, requiring heavy-duty reinforcement to support massive loads in high-heat environments.
Thermal Compatibility and Environmental Constraints
Salt walls function strictly as dry heat features. Their hygroscopic properties—drawing moisture from the air—work best in infrared saunas where direct body warming keeps humidity low. Placing these bricks in a steam sauna is a guaranteed failure; the high moisture content dissolves the salt rapidly, destroying the installation. Even in traditional Finnish setups, strategic placement is necessary to avoid water erosion from heater splashing.
Lighting integration requires components that withstand extreme thermal fluctuations without creating hotspots that crack the bricks.
- Operating Range: Components must handle cycles from -13°F to 230°F.
- Lighting Spec: IP67 LED strips (24VDC) prevent moisture ingress and manage heat load.
- Power Density: Systems often draw 288W (White) to 439W (RGB) for a 24-strip array.

Structural Load and Engineering Specifications
The primary challenge in salt wall design is weight management. A single Himalayan salt brick weighs between 4.85 and 5 lbs. While individual bricks seem manageable, the cumulative load on a vertical surface rises quickly. Standard drywall will bow or collapse under this pressure. Installation requires ¾-inch plywood backing or stainless steel channels anchored directly to studs to ensure stability.
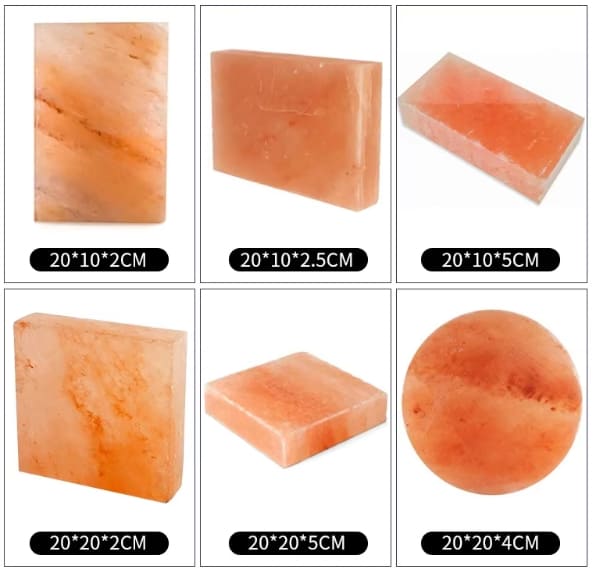
- Brick Dimensions: Typically 4”H x 8”W x 2”D or 8”x4”x1”.
- Wall Weight (60″H): Approximately 476 lbs for a standard 48″ width.
- Wall Weight (98″H): Escalates to 760 lbs for the same 48″ width.
- Mounting System: Glueless metal profiles (15/16”H) allow for thermal expansion without cracking.
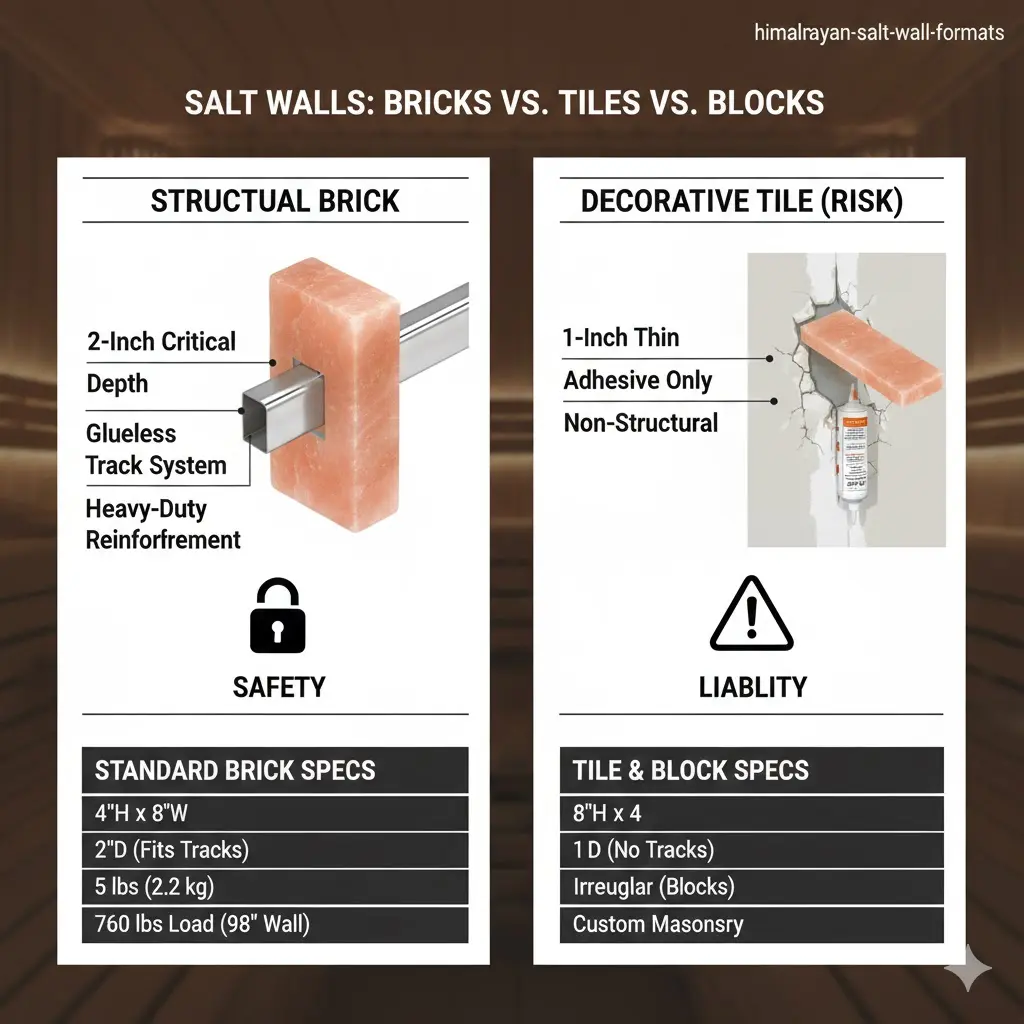
Salt Bricks vs. Tiles vs. Blocks
The industry standard for structural sauna walls is the 4”H x 8”W x 2”D Salt Brick. Thinner “tiles” lack the 2-inch depth required for glueless metal track systems.
| Product Format | Standard Dimensions | Depth (Critical) | Installation Method |
|---|---|---|---|
| Salt Brick (Standard) | 4”H x 8”W | 2 Inches | Metal Track System |
| Salt Tile | 8”H x 4”W | 1 Inch | Adhesive (Non-Structural) |
| Raw Block | Varied / Cubic | Irregular | Custom Masonry |
Standardized Brick Dimensions vs. Market Terminology
Suppliers frequently interchange the terms “brick,” “block,” and “tile,” creating confusion during procurement. However, if you are building a backlit salt wall using a glueless mounting system, the physical dimensions are non-negotiable. The 4”H x 8”W x 2”D brick is the universal standard engineered to fit stainless steel profiles.
The 2-inch depth is the most critical metric. Metal channels used for mounting specifically accommodate this thickness. “Tiles” generally refer to 1-inch thick cuts, which are too fragile for vertical stacking and incompatible with standard tracks. While European metrics (200 x 100 x 50 mm) exist, they roughly translate to the same 8” x 4” x 2” format widely available in the North American market.
Weight Load Calculations and Structural Requirements
Himalayan salt is dense rock, not decorative drywall. A single standard brick weighs approximately 5 lbs (2.2 kg). While this seems manageable per unit, the cumulative dead load rises rapidly and exceeds the capacity of standard residential wall framing without modification.
- Unit Weight: ~5 lbs per 4” x 8” x 2” brick.
- 60” Wall Load (48”W): 476 lbs.
- 96” Wall Load (48”W): 760 lbs.
- Profile Spec: Stainless steel channels (15/16”H x 2 7/8”D).
Standard drywall will buckle under a 760 lb load. You must reinforce the installation area with ¾-inch plywood backing or anchor the stainless steel channels directly into the studs. The metal profile system allows the bricks to expand and contract with heat without cracking, a necessary feature that adhesive-based “tile” installations lack.
The “Crying” Wall Problem
“Crying” walls occur when hot sauna air condenses on cold surfaces. Prevent structural rot with a sealed foil barrier and R-21 insulation.
Condensation Physics and Structural Risks
This isn’t just about wet walls; it is a thermodynamic failure. The “crying” effect happens when hot, humid sauna air—often reaching 300°F with 10-20% humidity—migrates into uninsulated or poorly sealed cold wall cavities. Once this vapor contacts a surface below the dew point, it condenses into liquid water droplets.
If you ignore this, you invite hidden mold growth and rot. In colder climates, this trapped moisture freezes and expands, causing physical damage to the structure. This risk spikes in corrugated container saunas or builds that lack a continuous thermal break.
Vapor Barrier Protocols and Insulation Specs
To seal the room effectively, you must control the temperature behind the walls. The goal is to keep the surface temperature behind the foil around 175°F to prevent condensation. You achieve this through specific material standards:
- Barrier Standard: Use a foil-faced vapor barrier rated to 1000°F. Seal all seams with high-temp aluminum tape or 3M 3381 tape to block steam migration.
- Insulation Metrics: Install minimum R-21 insulation. Standard specs include 6″ mineral wool or 4″ PIR foam.
- Air Gap Requirement: Install furring strips between the vapor barrier and cladding (e.g., Western Red Cedar) to allow airflow and prevent trapped moisture.
Premium Himalayan Salt Bricks at Factory-Direct Prices
Method 1: Glue/Adhesive
Standard mortar fails on non-porous salt. Use specialized clear adhesives like Sika; one 300ml cartridge typically secures 30 standard bricks.
Selecting the Correct Adhesive: Sika vs. Traditional Mortar
Traditional masonry techniques do not work with Himalayan salt. Standard cement mortar relies on water absorption to form a mechanical key with the brick, but salt bricks possess near-zero porosity. This lack of absorption prevents mortar from bonding, leading to structural failure.
Contractors must replace mortar with chemical bonding agents. Industry standards favor Sika clear adhesive glue or specialized non-toxic epoxies. These options provide the necessary chemical adhesion while maintaining the transparency required for backlit walls. If the installation targets a sauna, the adhesive formulation must specifically resist high heat and humidity to maintain integrity over time.
Application Guidelines and Coverage Metrics
Precise material calculation prevents project delays. A single 300ml adhesive cartridge effectively bonds approximately 30 standard bricks (based on 203 x 101.5 x 51 mm dimensions). Application generally utilizes a standard glue gun for consistent bead width.
- Pack Sizing: Budget 3 tubes for every 100 bricks to account for wastage and ensure full coverage.
- Surface Prep: Apply adhesive only to dry, dust-free surfaces. Moisture or salt dust compromises the immediate tack.
- Cleanup: Remove excess glue immediately using water and a brush. Cured adhesive on the salt face causes permanent visual defects.
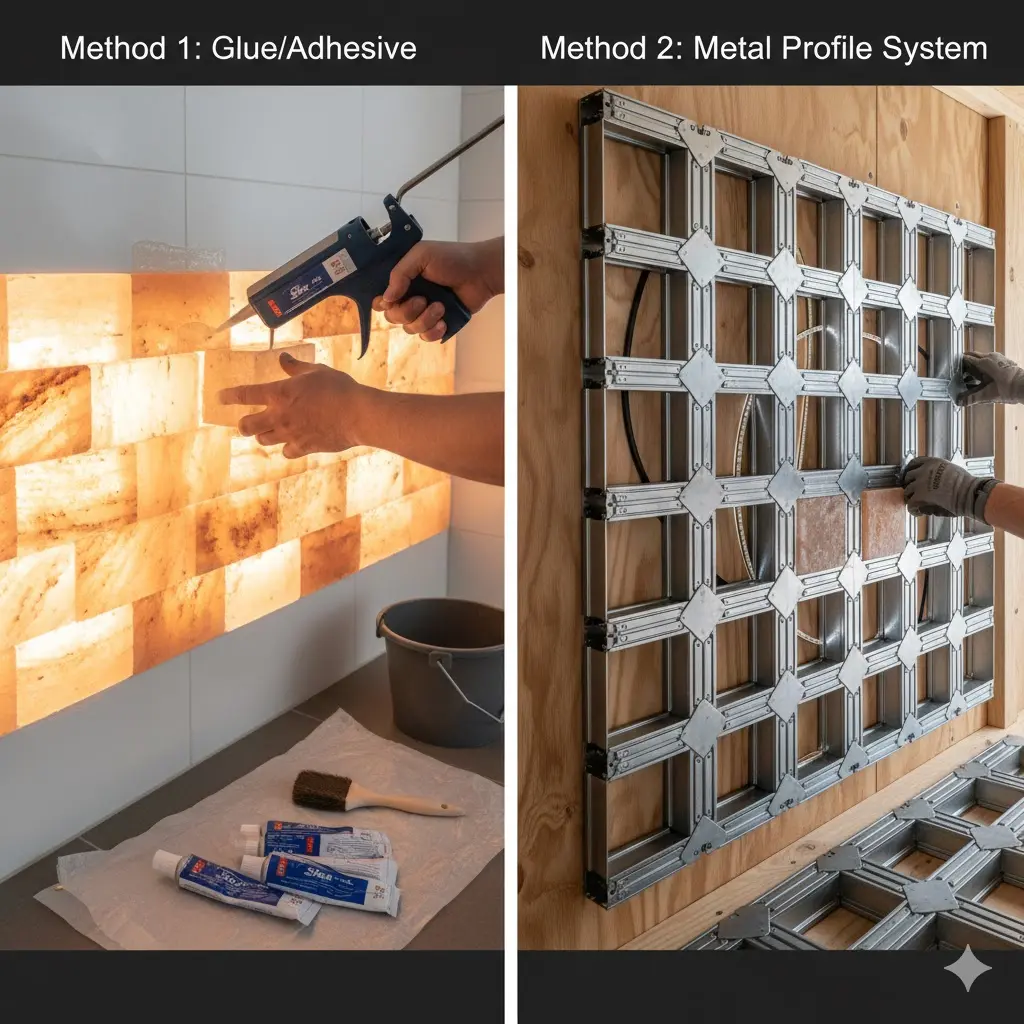
Method 2: Metal Profile System
This dry installation method uses mechanically locked 22-24 gauge steel grids to secure salt bricks, supporting heavy loads and backlighting without failure-prone chemical adhesives.
| Specification Category | Technical Requirement | Engineering Purpose |
|---|---|---|
| Core Material | 22-24 ga Galvalume or 0.040″ Aluminum | Corrosion resistance & structural rigidity |
| Locking Mechanism | Mechanical Seam (180° Double Lock) | Secure retention without chemical bonding |
| Seam Height | 2.0 inches | Vertical support for 2″ depth bricks |
| Substrate Backing | ¾-inch Plywood | Anchoring for 500+ lb wall loads |
System Concept: Mechanical Locking & Dry Installation
Adhesives inevitably degrade in the high-heat, humid cycles of a sauna. The metal profile system eliminates this failure point by utilizing a “dry” installation method. Instead of glue, the system employs mechanical seams—typically a 90° single or 180° double lock—to clamp the salt bricks securely. This mechanical grip accommodates the salt’s natural thermal expansion and contraction without cracking the mounting surface.
This grid structure also solves the maintenance and lighting issues inherent to glued walls. By spacing the salt away from the substrate, the profile creates a ventilation gap ideal for integrating IP67-rated LED strips. If a specific brick fails or an LED strip needs service, maintenance teams can remove individual sections without dismantling the entire wall assembly.
Technical Specifications: Material Grades & Load Standards
Standard drywall cannot support the dead load of a salt wall. A single 4″x8″x2″ Himalayan salt brick weighs approximately 5 lbs. A modest 48″ x 60″ feature wall weighs roughly 476 lbs, while taller installations exceed 760 lbs. To prevent bowing or structural collapse, installation requires specific engineering parameters:
- Material Composition: 22-24 gauge Galvalume steel or 0.040″ aluminum for maximum corrosion resistance in saline environments.
- Profile Dimensions: Standard 16-18″ finished widths with a 2.0-inch seam height to match standard brick depth.
- Structural Backing: Must anchor to ¾-inch plywood or direct stud channels to manage dead loads.
- Load Compliance: Profiles align with UL 580/UL 1897 Class A uplift ratings and FM 4471 foot traffic standards (250 lb point load).
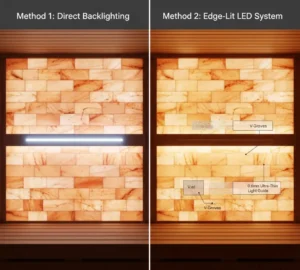
Backlighting Techniques
Edge-lit LED systems with 0.25–0.6 mm light guides use V-groove extraction to eliminate hotspots, creating the uniform glow required for translucent salt walls.
Edge-Lit LED Systems & Uniformity
Direct backlighting often fails with translucent salt blocks. Beaming light directly through the crystal structure creates distinct, harsh “hotspots” that disrupt the visual texture. In dim environments like saunas, this point-source lighting ruins the intended ambient aesthetic.
Edge-lighting resolves this by using side-firing high-efficiency LEDs coupled with lens arrays. The light travels laterally through the guide and extracts evenly across the surface rather than punching through it. This configuration also allows for precise color mixing within the guide before the light exits, preventing the jarring color banding frequently seen in direct-lit setups.
Light Guide Specifications & Installation
Professional integrators use ultra-thin light guides designed for low-profile integration behind salt panels. These assemblies require specific materials and engineering tolerances to maintain uniformity without adding bulk.
- Thickness Profile: Light guide films range from 0.25 mm (minimum) to 0.6 mm total assembly thickness.
- Extraction Technology: Manufacturers use laser-etched V-grooves or printed dots on acrylic/polycarbonate films to control brightness.
- Quality Standards: High-end assemblies adhere to ISO 2001 quality standards and semiconductor guidelines.
- Alignment: Precise LED-film alignment is mandatory to prevent light bleed at the panel edges.
Final Thoughts
Treat salt walls as structural engineering, not interior decor. Failing to reinforce for the 700-pound load guarantees a costly collapse.
Skip the adhesive and specify the stainless steel profile system with 2-inch bricks. This dry-mount method prevents cracking and allows instant LED maintenance.
Experience the quality firsthand with our low-threshold trial order – a risk-free way to test these high-margin products in your market. Get in touch to start your trial order today!
Frequently Asked Questions
Will Himalayan salt bricks melt in a sauna?
No. Salt bricks have a melting point of 1,473.4°F (800.8°C), far exceeding the 190°F–200°F range of a typical sauna. They will only dissolve or degrade if exposed to direct, heavy moisture or standing water.
What is the safest glue for installation?
Use Sika clear adhesive or a specialized salt-powder adhesive mixed at a strict ratio of 1 kg glue to 250 ml water. Ensure the adhesive is formulated specifically to bond with salt, as standard construction adhesives often fail or cause chemical reactions under heat.
Does steam damage the salt wall?
It depends on volume. Direct, constant steam without ventilation causes weeping and erosion. You must install a foil-faced vapor barrier and proper air gap behind the wall to protect insulation. Avoid installing salt bricks in dedicated steam rooms (100% humidity).
How long do salt walls last?
In dry, controlled environments, they last indefinitely because salt is a non-decaying mineral. In active saunas, with proper moisture management and maintenance, expect a lifespan exceeding 10 years.
Should I use mortar or glue?
For structural or taller walls, use Type N or Type S portland cement-lime mortar per ASTM C 270 standards. Adhesives lack the necessary compressive strength for load-bearing walls and are best suited for non-structural, decorative, or backlit applications.
How do you clean a salt brick wall?
Dust with a dry brush or vacuum. For sanitizing, lightly spray a botanical disinfectant like Benefect Decon 30, wait 10 minutes, and wipe completely dry. Never use soaking wet cloths or chemical detergents, as these will dissolve the salt surface.